Hosting a Ghost website for Free* using AWS + Terraform

Ghost is a powerful, free, open source, application for hosting websites and newsletters, with a vibrant ecosystem of integrations and customisations. A managed offering is available in the form of Ghost Pro, with a free trial available and regular subscriptions starting at $9 a month.
In this article though, we'll set one up the DevOps way - with a setup that is almost free* for a year, using AWS and the Infrastructure-as-Code (IaC) tool Terraform.
*you will still need to pay a few $ per year for a domain name. Also, if the site gets too popular (more than 1TB out of CloudFront per month) you will have to pay for that overage
If you feel comfortable with Terraform and want to skip straight to the source code, you can find it here!
Overview
- On first creation, each AWS account comes with a tasting menu of free-tier offerings from the many services they have on offer for the first 12 months. The services we'll be using to deploy this site include:
EC2 - Elastic Compute Cloud
- 750 hours on a
t2ort3.microinstance (region dependant) - 750 hours for a public IPv4 address
EBS - Elastic Block Storage
- 30GB of General Purpose (SSD) storage
RDS - Relational Database Service
- 750 hours of
db.t4g,t3, ort2.microdatabase instance - 20GB of General Purpose (SSD) storage
Cloudfront - Content Delivery Network (CDN)
- Up to 1TB of internet traffic per month
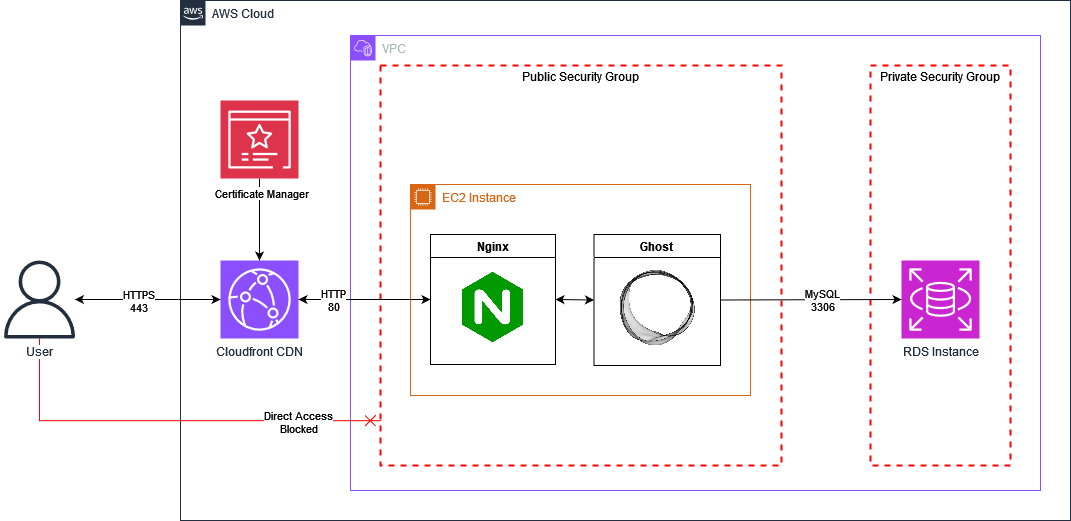
In addition to the above mentioned services, we'll also make use of some of the always-free resources in AWS, such as Identity and Access Management (IAM) and a Virtual Private Cloud (VPC).
When finished, the overall architecture of the deployment will look something like this:
Prerequisites: AWS Account Setup and Tools
To start, you must first create an AWS account. Follow the steps - you'll need to provide an email address and credit card, though if you follow this guide, you shouldn't incur any charges within the first year (unless your site becomes super popular, that is!)
To give some peace of mind that you won't be incurring any unexpected charges, set a zero-spend budget. This can be done by clicking the account name in the top right, and then Billing and Cost Management. Then on the left, select Budgets, and on the page select Create budget. Select the Zero spend template, and add your email address. Create the budget, and you will now be notified if you ever incur any charges. Note that billing in AWS usually lags a day behind, so notifications won't be instant, but you shouldn't incur more than 1 day's charges without notice.
When you first login to your AWS account, you'll be logged in as the root user. It is best practice to not use the root account for your everyday use in AWS, as it has full priviledges in the account, including deleting it. To address this, we'll set up a new user for your everyday activities.
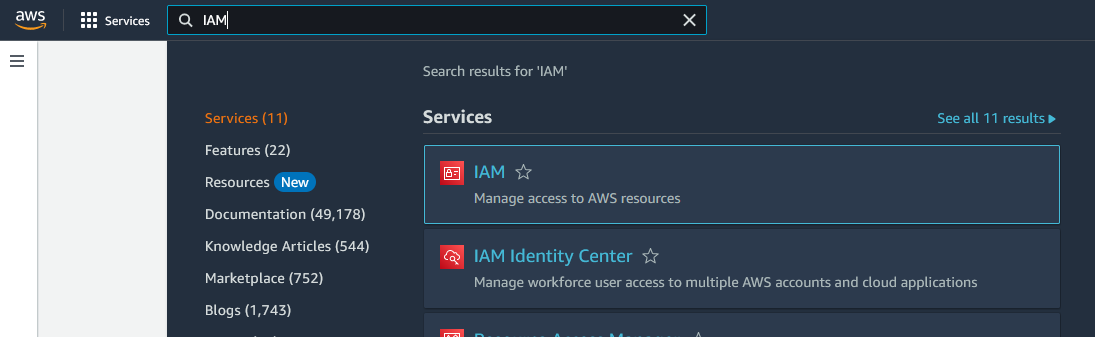
In the search bar, search IAM, which will link you to the IAM service.
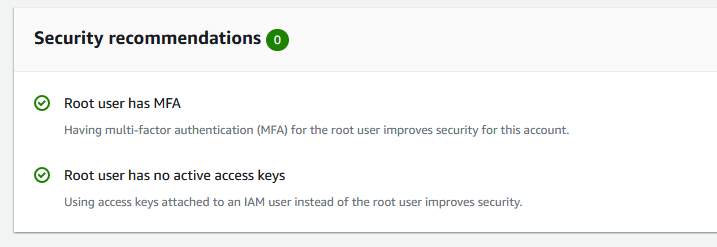
Once in the IAM dashboard, you'll be greeted by a notice that the root account does not have MFA (Multi-Factor Authentication) enabled. You can set it up using an app such as Google Authenticator or Authy.
With that set, you should have 2 green checks on your security recommendations
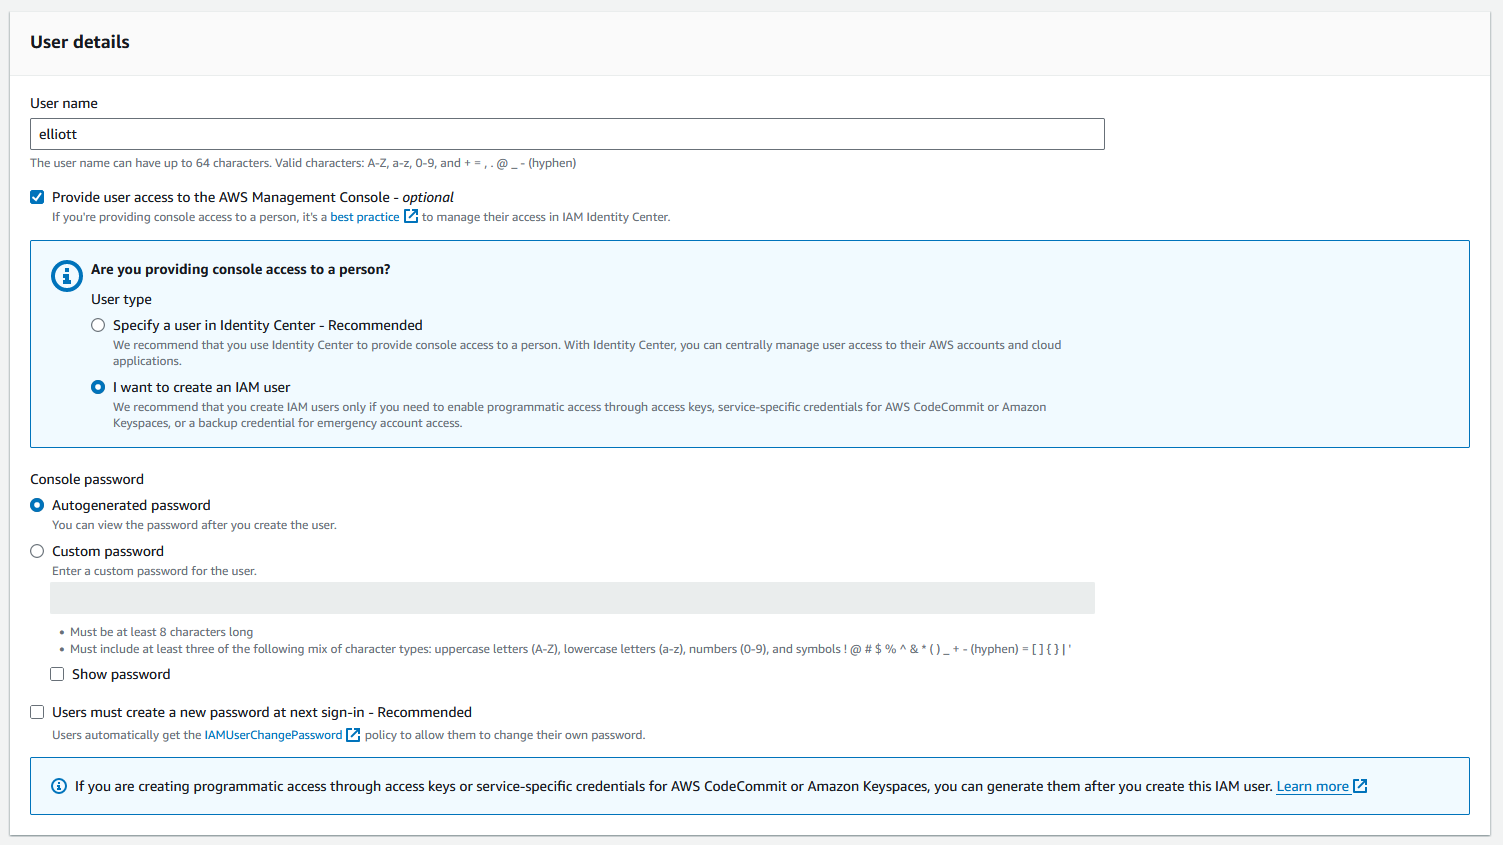
Next, select Users from the sidebar, then Create User. Use your own name, provide console access, create an IAM user, and autogenerate a password. If creating an account for someone else, check the box that forces them to change the password at next sign in.
On the next page, select Attach policies directly, then add the AdministratorAccess policy. Go through the next 2 pages, and you'll have a new user account. At this point, you should be able to log out of the root account, and log in with the new user account.
Go back to the users page, and you'll see your new user. Click on it, and then go to security credentials. You'll see an option to add MFA for the user (recommended), and an option to Create access key.
Select Command Line Interface (CLI) as the use case, accept the recommendations, then on the next page give the credentials a tag, such as 'cli'. You'll be shown the credentials on the following page. Leave this page open, we'll use them to set up the AWSCLI.
Follow the instructions for your OS on Installing the AWS CLI. Once installed, run aws configure, then follow the prompts to add your Access Key ID and Secret Access Key, and also select the default region. (check in the console for the one that's closest to you).
You can check you've set it up correctly by running aws sts get-caller-identity, it should give you an output of your username and account ID.
The final prerequisite is to install Terraform. Follow the steps for your OS, and you should be ready to writing some Terraform!
File structure
Create a new directory for your project. Ideally, use git so you can version your config.
Terraform config is fairly flat. Most of your files will be in the same level of your directory structure. When you run terraform commands inside a directory, all of the *.tf files at that level will be concatenated together. Sub-directories will be ingored. You can choose to put all your config in one file, or break it up into a logical structure, grouping related resources in a way that makes it easier to navigate. The order in which resources appear in code does not matter, as terraform will work out the dependency graph by itself. This allows you to focus more on laying out the config in a way that is easier to read.
Provider Configuration
Terraform uses a system of plugins called providers to communicate with the various cloud platforms and APIs in its ecosystem. Each provider is maintained by either Hashicorp, a partnered organizations, or the community. To tell Terraform which providers to use, we use the terraform block. This is also where we say which version of terraform our module is compatible with.
# providers.tf

terraform {
  required_version = "~> 1.0"
  required_providers {
    aws = {
      source  = "hashicorp/aws"
      version = "~> 5.0"
    }
  }
}
Here, we've used the ~> operator, which means it will use the latest available version that doesn't change the major version, so terraform version 1.X, and AWS provider version 5.X.
We'll also add configuration for the AWS provider using a provider block
# provider.tf

provider "aws" {
  region = var.aws_region

  default_tags {
    tags = {
      Terraform = "true"
    }
  }
}
Here we've set the provider to reference a variable var.aws_region, and also told the provider to add default_tags to all resources that it creates. This means that when viewing resources in the console, everything created by terraform will have the tag Terraform = "true" attached. If we were in an environment where we wanted to ensure that all resources were captured in terraform, this would give us an easy way to find untagged, and therefor manually created, resources.
We'll create a variable for the aws_region like this
# variables.tf

variable "aws_region" {
  description = "The region in which to deploy the module."
  type        = string
}
A variable allows us to pass inputs to the module. This can either be done with a *.auto.tfvars file, or by referencing this module in another terraform config with a module block.
VPC
Before you can deploy any resources into AWS, you must first set up a VPC. Each region in an AWS account will have a default VPC configured already, but for this project, we'll configure our own.
# vpc.tf

resource "aws_vpc" "this" {
  cidr_block = var.vpc_cidr

  enable_dns_hostnames = true

  tags = {
    Name = var.deployment_name
  }
}
# variables.tf
variable "deployment_name" {
type = string
description = "Name used for the deployment."
default = "ghost"
}
variable "vpc_cidr" {
type = string
description = "The CIDR block for the VPC."
default = "10.0.0.0/16"
}Here we've defined our first resource, an aws_vpc named this. All resources must be named, but if there is only one of its kind in a module, naming it this is a common practice.
It references two variables, deployment_name and vpc_cidr, but these both have default values, so we don't have to include them in our input variables unless we want to change the values.
We've also set enable_dns_hostnames = true, this means that when we create our EC2 instance, it will be given a DNS address.
Next we want to create some subnets. We'll have a public subnet that is reachable from the internet, and a private subnet that can only be reached by resources running in the public subnet.
Now, here we have to work around some AWS quirks. In order to ensure our database goes in the
privatesubnet, we have to define adb_subnet_group, but adb_subnet_grouprequires a minimum of 2 subnets. So even though we only need one subnet to deploy our database to, we must create another in order to create the group. For symmetry, we'll create 2publicsubnets as well.
We'll do this as follows, creating a subnet per availability zone (AZ).
# vpc.tf

# This fetches all the available AZs within a region because
# zone 'a' is not always necessarily available. We will then
# have to `slice()` this list to match the number of provided subnets
data "aws_availability_zones" "available" {}

# Here we take a list of the AZs, and map them to lists of provided
# subnet CIDRs. This is slightly overkill for the setup we're using,
# but gives an idea of how you might set up a VPC in a production environment
locals {
  azs       = slice(data.aws_availability_zones.available.names, 0, length(var.private_cidrs))
  # We'll use the first AZ in the list to deploy our resources to
  target_az = local.azs[0]

  public_az_cidrs  = zipmap(local.azs, var.public_cidrs)
  private_az_cidrs = zipmap(local.azs, var.private_cidrs)
}

# We create a subnet `for_each` CIDR in our `public_az_cidrs` map
resource "aws_subnet" "public" {
  for_each = local.public_az_cidrs
  vpc_id   = aws_vpc.this.id

  cidr_block        = each.value
  availability_zone = each.key

  enable_resource_name_dns_a_record_on_launch = true
  map_public_ip_on_launch                     = true

  tags = {
    Name          = "${var.deployment_name}-subnet-public-${each.key}"
    security-tier = "public"
  }
}

resource "aws_subnet" "private" {
  for_each = local.private_az_cidrs
  vpc_id   = aws_vpc.this.id

  cidr_block        = each.value
  availability_zone = each.key

  tags = {
    Name          = "${var.deployment_name}-subnet-private-${each.key}"
    security-tier = "private"
  }
}

# Take the ids from the created private subnets, and feed them into a list
resource "aws_db_subnet_group" "private" {
  name       = lower("${var.deployment_name}-db-subnet-group-private")
  subnet_ids = [for k, subnet in aws_subnet.private : subnet.id]

  tags = {
    Name          = "${var.deployment_name}-db-subnet-group-private"
    security-tier = "private"
  }
}
# variables.tf
variable "public_cidrs" {
description = "List of CIDRs to use for public subnets."
type = list(string)
default = ["10.0.0.0/24", "10.0.2.0/24"]
}
variable "private_cidrs" {
description = "List of CIDRs to use for private subnets."
type = list(string)
default = ["10.0.100.0/24", "10.0.102.0/24"]
}We also need to setup routing tables, and for the public subnet, an internet gateway. With no config, a route table will simply route traffic within the VPC. For the public route table, we'll tell it that anything outside of the VPC CIDR range (0.0.0.0/0) should be routed through the internet gateway.
# vpc.tf

resource "aws_internet_gateway" "public" {
  vpc_id = aws_vpc.this.id

  tags = {
    Name = "${var.deployment_name}-igw"
  }
}

resource "aws_route_table" "public" {
  vpc_id = aws_vpc.this.id

  route {
    cidr_block = "0.0.0.0/0"
    gateway_id = aws_internet_gateway.public.id
  }

  tags = {
    Name = "${var.deployment_name}-rtb-public"
    Description = "Default route table for public subnet"
  }
}

resource "aws_route_table_association" "public" {
  for_each       = toset(local.azs)
  subnet_id      = aws_subnet.public[each.value].id
  route_table_id = aws_route_table.public.id
}

resource "aws_route_table" "private" {
  vpc_id = aws_vpc.this.id

  tags = {
    Name        = "${var.deployment_name}-rtb-private"
    Description = "Default route table for private subnet"
  }
}

resource "aws_route_table_association" "private" {
  for_each       = toset(local.azs)
  subnet_id      = aws_subnet.private[each.value].id
  route_table_id = aws_route_table.private.id
}
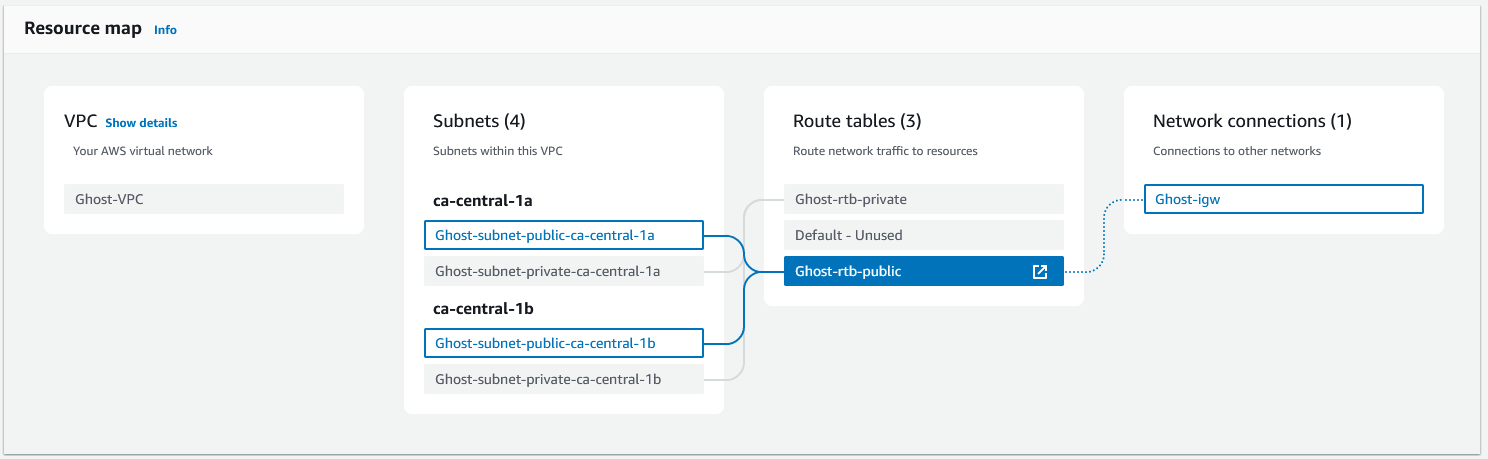
With that configured, we can run terraform apply, and should be able to view our VPC in the console:
For the final piece of the networking config, we'll set up the security groups. A security group is like a firewall, where we can define rules that say what traffic is allowed on which ports, and from/to which IP ranges. We can then attach these security groups to resources such as our EC2 instance and RDS database. When a security group is created in the AWS console, by default it will block all ingress traffic, and allow all egress. However, when created in Terraform, all rules must be set explicitly.
We need to set up 2 groups: one for our Ghost app, and one for our database. The Ghost app group will allow ingress traffic from the CloudFront CDN on port 80, and (optionally) all traffic from an admin IP address that we specify (us). This will protect our application server from being overwhelmed by traffic that attempts to bypass the CDN. It will allow all egress traffic, so the server is still able to fetch resources and updates.
The database security group is very simple - the only allowed inbound traffic is on the MySQL port 3306, and no egress is allowed.
# security_groups.tf

# APPLICATION

resource "aws_security_group" "app" {
  name   = var.deployment_name
  vpc_id = aws_vpc.this.id
}

# A list of all the CloudFront Edge IP addresses, managed by AWS
data "aws_ec2_managed_prefix_list" "cloudfront" {
  name = "com.amazonaws.global.cloudfront.origin-facing"
}

resource "aws_vpc_security_group_ingress_rule" "app_from_cloudfront" {
  description       = "HTTPS from CloudFront"
  security_group_id = aws_security_group.app.id
  from_port         = 80
  to_port           = 80
  ip_protocol       = "tcp"
  prefix_list_id    = data.aws_ec2_managed_prefix_list.cloudfront.id
}

resource "aws_vpc_security_group_ingress_rule" "app_from_admin" {
  # This rule is only created if an `admin_ip` variable is given.
  count             = var.admin_ip != null ? 1 : 0
  description       = "Admin Access to App"
  security_group_id = aws_security_group.app.id

  ip_protocol = "-1"
  cidr_ipv4   = var.admin_ip
}

resource "aws_vpc_security_group_egress_rule" "app_to_all" {
  description       = "Allow all egress"
  security_group_id = aws_security_group.app.id

  ip_protocol = "-1"
  cidr_ipv4   = "0.0.0.0/0"
}


# DATABASE

resource "aws_security_group" "db" {
  name   = "${var.deployment_name}-db"
  vpc_id = aws_vpc.this.id
}

resource "aws_vpc_security_group_ingress_rule" "db_from_app" {
  description                  = "Database access from App"
  security_group_id            = aws_security_group.db.id
  from_port                    = 3306
  to_port                      = 3306
  ip_protocol                  = "tcp"
  referenced_security_group_id = aws_security_group.app.id
}
RDS Database
Before we can set up the ghost app, we need to create a database for it to connect to. This will provide a persistent data store for our posts and configuration, giving us freedom to upgrade or even completely destroy our app instance without data loss. It also offloads some of the compute load from our app instance, which is particularly important when we're dealing with such limited resources - our EC2 instance and database will only have 1 or 2 vCPU cores and 1 GiB of memory each.
As not all regions are made equal, we will first fetch a list of db instance classes that are available. We'll also add a variable, in case we want to manually specify the instance class instead.
# database.tf

data "aws_rds_orderable_db_instance" "free-tier" {
  engine = "mysql"

  # The following are all eligible for free tier
  preferred_instance_classes = ["db.t4g.micro", "db.t3.micro", "db.t2.micro"]
}

locals {
  db_instance_class = var.db_instance_class != null ? var.db_instance_class : data.aws_rds_orderable_db_instance.free-tier.instance_class
}
# variables.tf
variable "db_instance_class" {
type = string
description = "Optionally set the desired instance class for the database isntance. Leave unset to use a free-tier instance class."
default = null
}We'll then create our MySQL 8.0 database in the target_az, within the db_subnet_group, with the desired db_instance_class, and the correct security group attached.
# database.tf

resource "aws_db_instance" "ghost" {
  allocated_storage = 20 #GiB
  identifier        = lower(var.deployment_name)
  db_name           = "ghost"
  engine            = "mysql"
  engine_version    = "8.0"
  instance_class    = local.db_instance_class
  password          = var.db_password
  username          = "ghost"
  availability_zone = local.target_az

  iam_database_authentication_enabled = true

  db_subnet_group_name   = aws_db_subnet_group.private.name
  vpc_security_group_ids = [aws_security_group.db.id]

  apply_immediately   = true
  skip_final_snapshot = true
}
We will set the db_password using a sensitive variable input. This prevents the value from being exposed by terraform commands, however it's important to note that this value will be viewable in the terraform state. In a production environment, it's important to restrict access to the state file to only the people and resources (such as deployment pipelines) that require it. There are better methods to manage secrets, but that is a much deeper topic.
# variables.tf

variable "db_password" {
  type        = string
  description = "The password for accessing the database. It is recommended to pass this as an environment variable, e.g. `TF_VAR_db_password`."
  sensitive   = true
}
That completes the setup of the database!
EC2 Instance (Application server)
We'll run our Ghost container on a free-tier EC2 instance. This will give us 1 or 2 vCPU cores, depending if it's a t2 or t3 instance respectively, as well as 1GiB of memory. We can have our module pick the correct instance class for any region using the following data source. We'll also make it possible to override with a variable.
# ec2.tf

data "aws_ec2_instance_types" "free_tier" {
  filter {
    name   = "free-tier-eligible"
    values = ["true"]
  }
}

locals {
  instance_type = var.instance_type != null ? var.instance_type : data.aws_ec2_instance_types.free_tier.instance_types[0]
}
# variables.tf
variable "instance_type" {
type = string
default = null
description = "Instance type for the machine. If unset, a free-tier instance will be used."
}Next, we'll pick the AMI (Amazon Machine Image). This will be the operating system for our application server. For our host, we will use Flatcar Container Linux, a Linux distro tailored to hosting containers.

It has the benefits of being immutable, has everything we need pre-installed (namely Docker), is very light on resources, and has a powerful configuration tool, which makes it a good fit for our terraform module.
We will fetch the latest version with this data source
# ec2.tf

data "aws_ami" "flatcar_stable_latest" {
  most_recent = true
  owners      = ["aws-marketplace"]

  filter {
    name   = "architecture"
    values = ["x86_64"]
  }

  filter {
    name   = "virtualization-type"
    values = ["hvm"]
  }

  filter {
    name   = "name"
    values = ["Flatcar-stable-*"]
  }
}
To configure the instance, we need to provide user_data. For most distros, this will take the form of a shell script. Flatcar, however, uses a 2-step process for this: a human readable Butane config written in yaml, which is then transpiled into a machine readable Ignition config in json. To handle this in terraform, we need to add two new providers, poseidon/ct, and hashicorp/template. We'll do this by updating the terraform block.
# providers.tf

terraform {
  required_version = "~> 1.0"
  required_providers {
    aws = {
      source  = "hashicorp/aws"
      version = "~> 5.0"
    }
    ct = {
      source  = "poseidon/ct"
      version = "~> 0.13.0"
    }
    template = {
      source  = "hashicorp/template"
      version = "~> 2.0"
    }
  }
}
For the containers, we are going to use the official Ghost and Nginx images. Ghost for our main app, and Nginx serving as a reverse proxy, giving us a bit more control over the traffic going to Ghost, and allowing us to manipulate some of the headers, which will be important later.
We'll create a templates folder, and in it we'll create the following butane template
# templates/butane.yaml.tmpl

variant: flatcar
version: 1.0.0
systemd:
  units:
    - name: docker-network.service
      enabled: true
      contents: |
        [Unit]
        Description=Docker Network service
        After=docker.service
        Requires=docker.service
        [Service]
        Type=oneshot
        TimeoutStartSec=0
        ExecStartPre=/usr/bin/sh -c "docker network rm flatcar || true"
        ExecStart=/usr/bin/docker network create flatcar
        RemainAfterExit=yes
        [Install]
        WantedBy=multi-user.target
    - name: ghost.service
      enabled: true
      contents: |
        [Unit]
        Description=Ghost service
        After=docker-network.service
        Requires=docker.service
        [Service]
        TimeoutStartSec=0
        ExecStartPre=-/usr/bin/docker rm --force ghost
        ExecStart=/usr/bin/docker run --name ghost --net flatcar --pull always --log-driver=journald -v /home/core/ghost/:/var/lib/ghost/content ${env_vars} ${ghost_image}
        ExecStop=/usr/bin/docker stop ghost
        Restart=always
        RestartSec=5s
        [Install]
        WantedBy=multi-user.target
    - name: nginx.service
      enabled: true
      contents: |
        [Unit]
        Description=Nginx service
        After=docker-network.service
        Requires=docker.service
        [Service]
        TimeoutStartSec=0
        ExecStartPre=-/usr/bin/docker rm --force nginx
        ExecStart=/usr/bin/docker run --name nginx --net flatcar --pull always --log-driver=journald -v /home/core/nginx/:/etc/nginx/conf.d/:ro -p 80:80 ${nginx_image}
        ExecStop=/usr/bin/docker stop nginx
        Restart=always
        RestartSec=5s
        [Install]
        WantedBy=multi-user.target
passwd:
  users:
    - name: core
      ssh_authorized_keys:
        ${ssh_keys}
storage:
  files:
    - path: /home/core/nginx/default.conf
      filesystem: root
      mode: 0755
      contents:
        inline: |
          ${nginx_config}
This template uses systemd to set up services for the docker-network, nginx, and ghost. Creating a user defined network is required to allow the containers to identify each other by hostname.
The terraform template provider allows us to pass in variables using the ${} notation.
We'll create a separate template for the Nginx config:
# templates/nginx.conf.tmpl

server {
  listen       80 default_server;
  listen  [::]:80 default_server;

  location / {
    proxy_set_header X-Forwarded-For $proxy_add_x_forwarded_for;
    proxy_set_header X-Forwarded-Proto $http_cloudfront_forwarded_proto;
    proxy_set_header X-Real-IP $remote_addr;
    proxy_set_header Host $host;
    proxy_pass http://ghost:2368;
  }

  client_max_body_size 50m;
}
These templates are populated using the following data sources.
# ec2.tf

locals {
  env_vars = merge({
    database__client               = "mysql",
    database__connection__database = "ghost",
    database__connection__user     = "ghost",
    database__connection__host     = aws_db_instance.ghost.address,
    database__connection__password = var.db_password
    # The built in CA for RDS has expired, a workaround is needed to get this to work properly https://github.com/TryGhost/Ghost/issues/19462
    # database__connection__ssl      = "Amazon RDS"

    url = "https://${var.domain_name}"
  }, var.ghost_extra_env_vars)
}

data "template_file" "machine-configs" {
  template = file("${path.module}/templates/flatcar.yaml.tmpl")

  vars = {
    ssh_keys          = jsonencode(var.ssh_keys)
    name              = var.deployment_name
    ghost_image       = var.ghost_image
    env_vars          = join(" ", [for k, v in local.env_vars : "-e ${k}='${v}'"])
    mount_device_name = local.persistent_data_device_name
    nginx_config      = indent(10, data.template_file.nginx-config.rendered)
  }
}

data "ct_config" "machine-ignitions" {
  content = data.template_file.machine-configs.rendered
}

data "template_file" "nginx-config" {
  template = file("${path.module}/templates/nginx.conf.tmpl")

  vars = {
    host = var.domain_name
  }
}
We'll then create the instance itself using an aws_instance resource.
# ec2.tf

resource "aws_instance" "flatcar" {
  instance_type = local.instance_type
  user_data     = data.ct_config.machine-ignitions.rendered
  ami           = data.aws_ami.flatcar_stable_latest.image_id
  key_name      = aws_key_pair.ssh.key_name

  subnet_id              = aws_subnet.public[local.target_az]
  vpc_security_group_ids = [aws_security_group.flatcar.id]

  tags = {
    Name = var.deployment_name
  }

  user_data_replace_on_change = true
}
To ensure that our assets will persist outside the lifecycle of the app server, we'll mount an EBS volume for them to persist on.
# ec2.tf

resource "aws_ebs_volume" "persistent-data" {
  availability_zone = local.target_az
  size              = 20

  tags = {
    Name = "flatcar-persistent-data"
  }
}

locals {
  persistent_data_device_name = "/dev/xvdf"
}

resource "aws_volume_attachment" "persistent-data" {
  device_name = local.persistent_data_device_name
  volume_id   = aws_ebs_volume.persistent-data.id
  instance_id = aws_instance.flatcar.id

  # Adding this option prevents terraform from detaching the volume while
  # the instance is still running. Terminating the instance detaches the volume
  skip_destroy = true
}
To be able to debug our instance, we can add an SSH key. Add the following resource, variable, and output
# ec2.tf

resource "aws_key_pair" "ssh" {
  key_name   = var.deployment_name
  public_key = var.ssh_key
}
# variables.tf
variable "ssh_key" {
type = string
description = "SSH public key for user 'core'."
}# outputs.tf
output "ec2_connection_details" {
value = {
public_dns = aws_instance.flatcar.public_dns
public_ip = aws_instance.flatcar.public_ip
username = "core"
}
description = "Use the following to connect to the EC2 instance as admin."
}Then, generate a key pair using the following commands
# Follow the prompts
ssh-keygen -t ed25519 -f ~/.ssh/ghost

# Get the public key
cat ~/.ssh/ghost.pub
Once the instance is running, and you have your admin_ip set, you should be able to connect to the instance using
# replace the IP address with the `public_ip` from the output
ssh -i ~/.ssh/ghost core@12.34.56.78 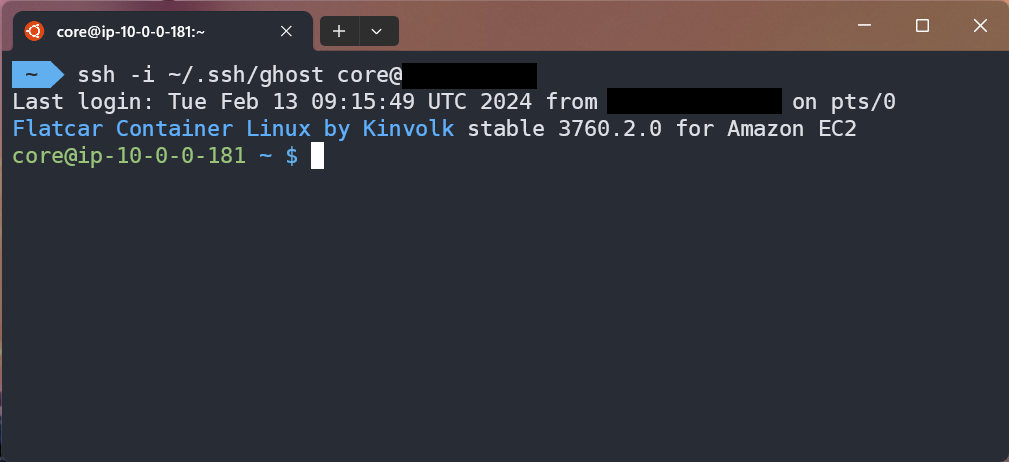
CloudFront Content Delivery Network (CDN)
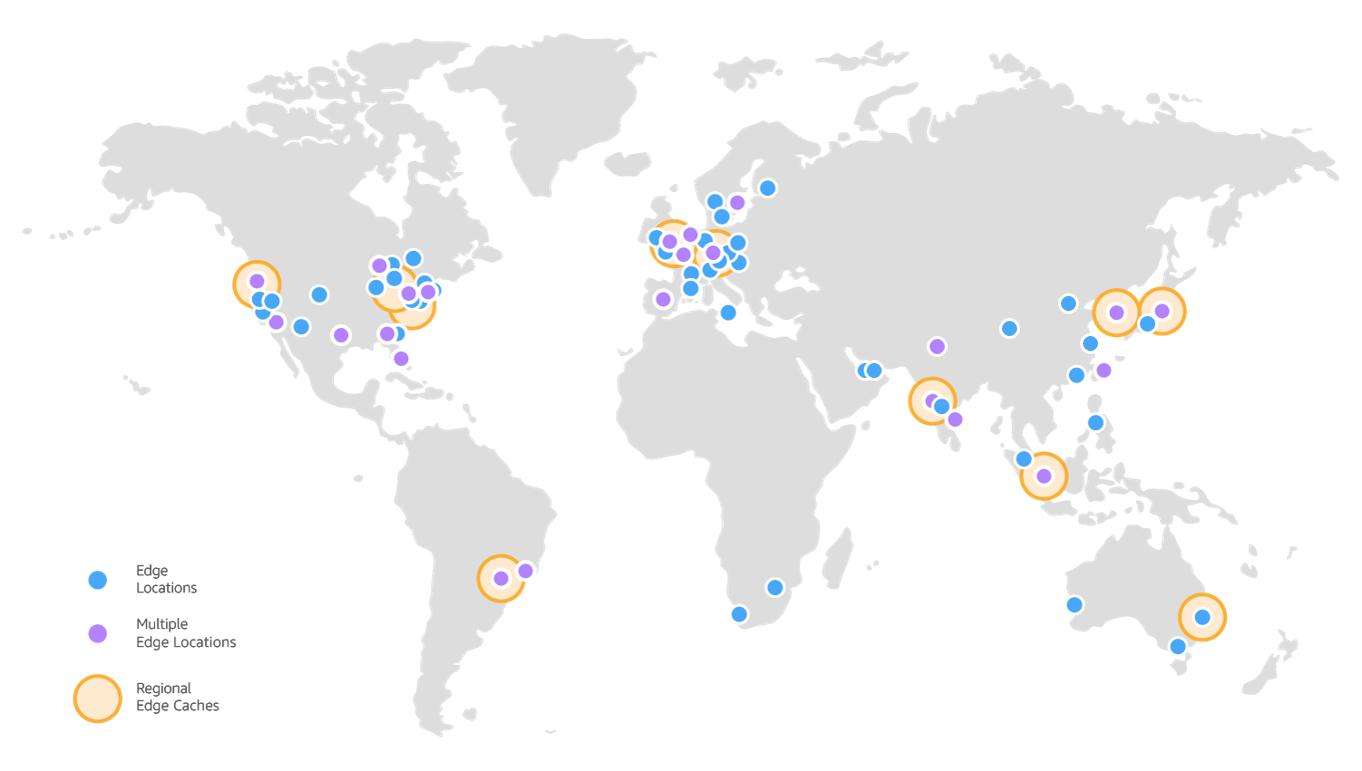
The final piece of infrastructure to get our blog going, is the CDN. This global network of servers caches the content of our website, reducing the latency for users, and reducing the load on our server. When a user goes to our site, instead of connecting directly to the server, they connect to CloudFront. The CloudFront server that the user connects to will check it's local cache to see if it already has the page the user is requesting. If it does (a cache hit), it serves it up straight away. If it doesn't (a cahce miss), it requests back to the application server (the origin), to get a new copy, and also saves a copy for later.
There are only two hard things in Computer Science: cache invalidation and naming things.
-- Phil Karlton
The main challenge around CDNs, is making sure users get the correct content. You don't want your users receiving stale content, or worse, seeing content intended for another user. This is where caching policies come in. Thankfully, AWS has most of the common usecases covered, so we can use their managed policies.
# cdn.tf

data "aws_cloudfront_cache_policy" "disabled" {
  name = "Managed-CachingDisabled"
}

data "aws_cloudfront_cache_policy" "optimized" {
  name = "Managed-CachingOptimized"
}

# Avoid serving cached, logged in pages to anonymous users
resource "aws_cloudfront_cache_policy" "caching-optimized-with-ghost-cookies" {
  name = "CachingOptimizedwithCookies"

  min_ttl     = 10
  max_ttl     = 31536000
  default_ttl = 86400

  parameters_in_cache_key_and_forwarded_to_origin {
    enable_accept_encoding_brotli = true
    enable_accept_encoding_gzip   = true

    cookies_config {
      cookie_behavior = "whitelist"

      cookies {
        items = [
          "ghost-members-ssr",
        ]
      }
    }

    headers_config {
      header_behavior = "none"
    }

    query_strings_config {
      query_string_behavior = "none"
    }
  }
}
We'll use the CachingDisabled policy on the management and API endpoints, those requests will always go to the server. For paths under /content/*, we'll use the CachingOptimized policy. For all other paths, we'll use a custom policy, caching-optimized-with-ghost-cookies. This uses similar seetings to the managed CachingOptimized policy, but we'll add a cache key on the ghost-members-ssr cookie that ghost uses for logged in users. This means that anonymous users will all share the same cached content, but each logged in user will get their own.
There's two more types of policy to account for: the origin_request_policy, and the response_headers_policy.
# cdn.tf

data "aws_cloudfront_origin_request_policy" "all-viewer" {
  name = "Managed-AllViewerAndCloudFrontHeaders-2022-06"
}

data "aws_cloudfront_response_headers_policy" "simple-cors" {
  name = "Managed-SimpleCORS"
}
With the policies added, we can now create the distribution.
# cdn.tf

resource "aws_cloudfront_distribution" "ghost" {
  aliases = [
    var.domain_name
  ]

  http_version = "http2and3"
  price_class  = "PriceClass_100"

  origin {
    domain_name         = aws_instance.flatcar.public_dns
    origin_id           = aws_instance.flatcar.id
    connection_attempts = 3
    connection_timeout  = 10


    custom_origin_config {
      http_port                = 80
      https_port               = 443
      origin_keepalive_timeout = 5
      origin_protocol_policy   = "http-only"
      origin_read_timeout      = 30
      origin_ssl_protocols = [
        "TLSv1.2",
      ]
    }
  }

  enabled         = true
  is_ipv6_enabled = true

  default_cache_behavior {
    allowed_methods  = ["GET", "HEAD"]
    cached_methods   = ["GET", "HEAD"]
    target_origin_id = aws_instance.flatcar.id
    compress         = true

    cache_policy_id            = aws_cloudfront_cache_policy.caching-optimized-with-ghost-cookies.id
    origin_request_policy_id   = data.aws_cloudfront_origin_request_policy.all-viewer.id
    response_headers_policy_id = data.aws_cloudfront_response_headers_policy.simple-cors.id

    viewer_protocol_policy = "redirect-to-https"
  }

  dynamic "ordered_cache_behavior" {
    for_each = toset(var.cached_paths)
    content {
      allowed_methods = ["GET", "HEAD"]
      cached_methods  = ["GET", "HEAD"]

      cache_policy_id            = data.aws_cloudfront_cache_policy.optimized.id
      origin_request_policy_id   = data.aws_cloudfront_origin_request_policy.all-viewer.id
      response_headers_policy_id = data.aws_cloudfront_response_headers_policy.simple-cors.id

      compress = true

      path_pattern           = ordered_cache_behavior.value
      target_origin_id       = aws_instance.flatcar.id
      viewer_protocol_policy = "redirect-to-https"
    }
  }

  dynamic "ordered_cache_behavior" {
    for_each = toset(var.uncached_paths)
    content {
      allowed_methods = ["DELETE", "GET", "HEAD", "OPTIONS", "PATCH", "POST", "PUT"]
      cached_methods  = ["GET", "HEAD"]

      cache_policy_id            = data.aws_cloudfront_cache_policy.disabled.id
      origin_request_policy_id   = data.aws_cloudfront_origin_request_policy.all-viewer.id
      response_headers_policy_id = data.aws_cloudfront_response_headers_policy.simple-cors.id

      compress = true

      path_pattern           = ordered_cache_behavior.value
      target_origin_id       = aws_instance.flatcar.id
      viewer_protocol_policy = "redirect-to-https"
    }
  }

  restrictions {
    geo_restriction {
      restriction_type = "none"
    }
  }

  viewer_certificate {
    acm_certificate_arn = aws_acm_certificate.cdn_cert.arn
    ssl_support_method  = "sni-only"
  }
}
The dynamic blocks are generated from the following variables.
# variables.tf

variable "cached_paths" {
  type    = list(string)
  default = ["/assets/*", "/content/*", "/public/*"]
  description = "Paths which should be cached for all clients."
}

variable "uncached_paths" {
  type    = list(string)
  default = ["/ghost/*", "/members/*"]
  description = "Paths which should not be cached."
}
Finally, in order for the CDN to handle TLS termination, it needs to have a certificate. For this we'll use Amazon Certificate Manager (ACM), however, there's another quirk to watch out for - CloudFront certs must always be created in the us-east-1 region. To do this, we'll need to add an additional aws provider block, with an alias to differentiate it from the main one.
# providers.tf

provider "aws" {
  alias = "global"

  region = "us-east-1"
  default_tags {
    tags = {
      Terraform = "true"
    }
  }
}
We can then add our ACM certificate like so
# cdn.tf

resource "aws_acm_certificate" "cdn_cert" {
  provider          = aws.global
  domain_name       = var.domain_name
  validation_method = "DNS"

  tags = {
    Name = var.deployment_name
  }

  lifecycle {
    create_before_destroy = true
  }
}
To validate the certificate, we'll need to create a DNS record. While we could technically do this using AWS Route53, I won't include it in this module, as a hosted-zone will cost an extra $0.50 month. Instead, we can pass the details as outputs, and that way they can either be copied into your hosting provider, or used inside a larger terraform module.
# outputs.tf

output "dns_acm_validation_records" {
  value = [
    for r in aws_acm_certificate.cdn_cert.domain_validation_options : {
      type  = "CNAME"
      name  = r.resource_record_name
      value = r.resource_record_value
    }
  ]
  description = "Record(s) required by ACM to validate TLS certificates."
}

output "dns_cloudfront_record" {
  value = {
    type  = "ALIAS or CNAME"
    name  = var.domain_name
    value = aws_cloudfront_distribution.ghost.domain_name
  }
  description = "Record required to point domain at the CDN. Use an ALIAS record if the `domain_name` is the apex, otherwise use a CNAME."
}
That's it! With those DNS entries, we should now be able to reach our blog in a web browser! After setting up the blog, you should immediately go to the /ghost path to set up your admin user.
All done!
Thanks for making it this far! You can find the complete code on Github. If you encounter any problems, either with this post, or the module itself, feel free to raise an issue.
Happy Terraforming!